No Active Household
Purpose: This article is intended to detail possible issues that can cause a No Active Household issues as well as detail possible solutions.
Possible Causes
- The student was not attached to a household when registered.
Possible Resolutions
These students will need to have a household created.
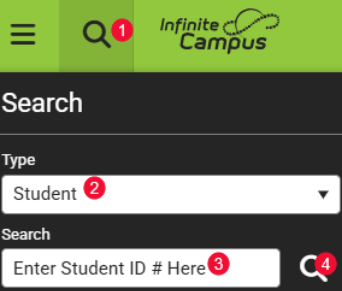
Search the Student using the following options or select the link on the Household Quality Report :
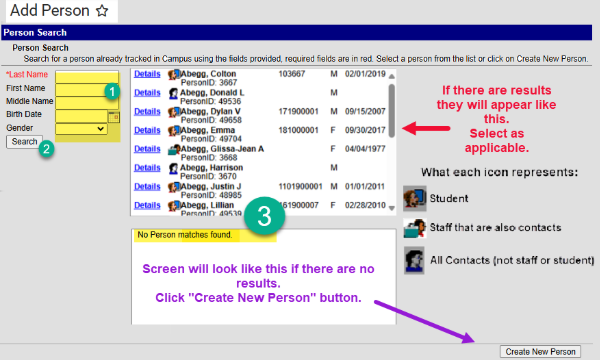
Go to Census > People > Add Person (page 9-11 of Census Manual)
- To avoid duplication, be sure to you search every combination of the name.
- If the name appears in the box and it is a match, select it.
- If the name does not appear in the box click the Create New Person button (bottom right).
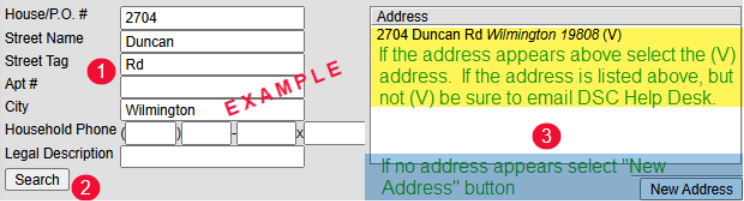
Go to Census > Address > Add Address (page 12-13 of Census Manual)
- Identify the students’ address
- Be sure to identify applicable information in each of the specific address fields
- Search
- If the address appears select the address identified in the Address box.
- Remember if the address is not (V) send it to DSC Help Desk.
- If the address does not appear, select the Create New button (bottom right).
- If the address appears select the address identified in the Address box.
Setting up a new household
Go to Census > Household > Census Wizard (page 14-16 of Census Manual):
Remember this is a 3-step process:
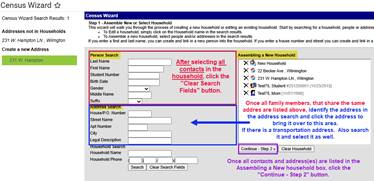
Step 1:
1. In the Person Search area search for each member of the household (student, mom, dad…).
2. Select the person’s name, from the “People Not in Households” to add them to the Assembling a New Household box.
3. Repeat until all people that reside in the household are listed in the box.
4. Click the “Clear Search Fields” button (next to the search button).
5. In the Address Search area, search the address to be identified to all the people you selected.
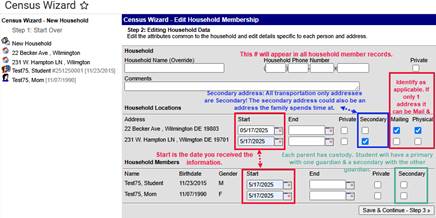
Step 2: Identify information about the household.
1. Identify the household phone # (Primary Phone # on Student Data Card).
2. Identify Start Date for each person listed.
3. For each address listed, select boxes as applicable: Mailing and/or Physical.
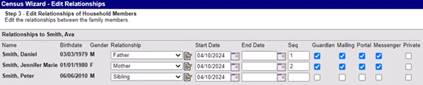
Step 3: Edit Relationships between Students and Household Members.
4. Relationship: ALWAYS start with the student identifying the relationship of the person to the student. As you identify the relationship, if there are siblings the information will auto fill for the siblings as well. Starting with the student helps prevent confusion.
5. Start Date: Is the date you received the information.
6. Sequence (Seq): The order in which contact(s) are called in case of emergency.
7. Check Boxes: Check as applicable to the relationship of the person to the student:
a. Guardian: check the box if the contact is a guardian to the student.
b. Mailing: If the address is a mailing address for a guardian, check the box.
c. Portal: check for all guardian contacts grades EC – 12.
d. Messenger: check for guardian contacts to receive messages about the student.
8. Click Save & Done. Screen will flash and information will be saved.